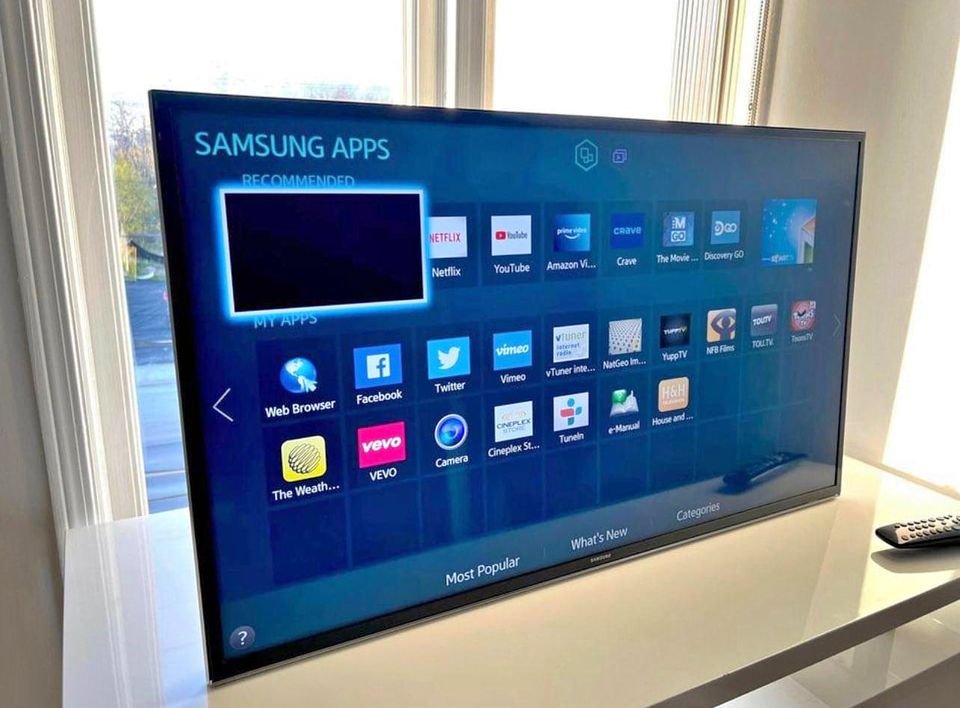
I absolutely love Samsung TVs because they come with a wide range of connectivity options that make screen mirroring and data sharing a breeze. It doesn’t matter if I’m using VGA or HDMI, I can easily connect my computer to the TV and enjoy the convenience of viewing my computer screen on a larger display.
However, like every piece of modern tech, they come with glitches. One glitch I’ve had to deal with is an annoying error prompt that says “mode not supported.” This error basically means that my TV is unable to handle the data sent through HDMI or VGA.
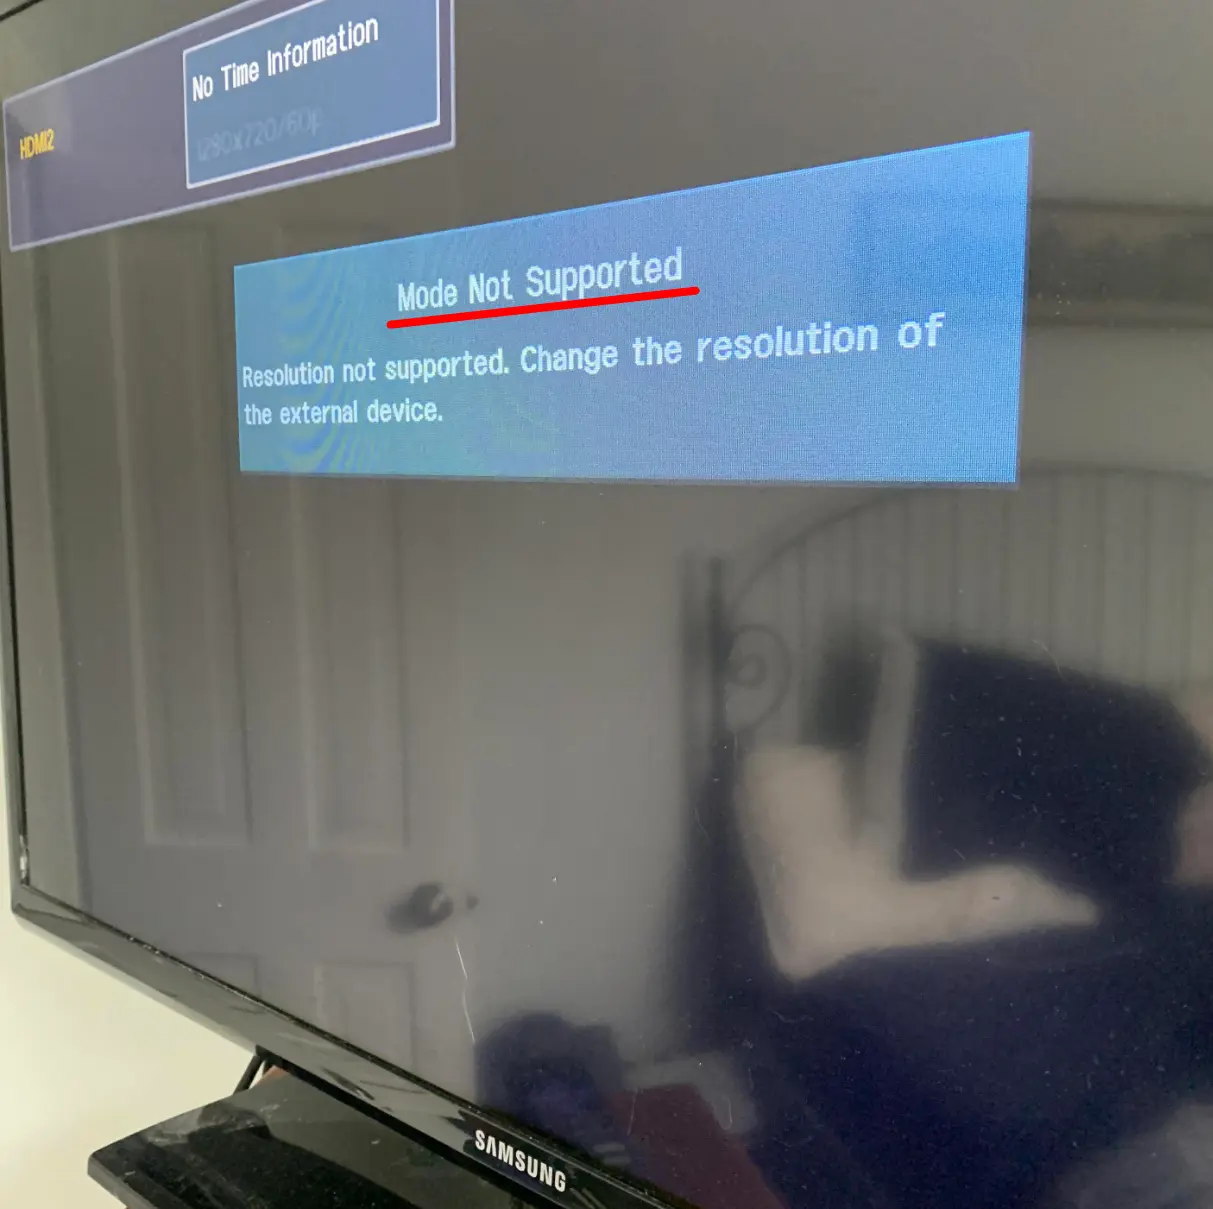
After much trial and error, I figured out how to fix it. I’ll share some simple hacks that I’ve discovered.
Samsung TV Mode Not Supported Error
Typically, the mode not supported error can occur on your Samsung TV when the screen resolution has not been properly configured, causing a communication issue between the TV and the connected PC. When this error arises, your TV becomes unable to display images, resulting in the inability to receive signals and data from the PC.
Samsung TVs are compatible with various resolutions, and each model has its own supported picture size. If the processed image resolution is excessively high or too small, you may encounter the mode not supported error.
Fortunately, most Samsung TVs come with a comprehensive user manual that provides all the necessary information about your specific model. This manual includes a list of supported resolutions for your Samsung TV, with the most common ones being 720p and 1080p.
How to Fix Samsung TV Mode Not Supported – 6 Ways
The “mode not supported” error message appears when you connect a device such as a DVD player, cable box, flash drive, or any other device to your TV that is configured to a resolution not supported by your TV.
Here are five ways to fix mode not supported error on Samsung smart TV.
1. Cast a Supported Resolution
It is important that the device you are connecting to your TV is able to output a resolution that is supported. Below are the resolutions supported by the majority of Samsung TVs.
- 480i/p (640 x 480)
- 720p (1280 x 720)
- 1080i/p (1920 x 1080)
- 2160p (3840/4096 x 2160
2. Power Reset the TV and External Drive
The “mode not supported” error message can sometimes occur due to a glitch either in the TV or the connected external device. Thankfully, performing a power reset can often resolve this issue. To power reset your Samsung TV, follow these steps:
- Turn off your TV and also power off the external device (e.g., DVD player, cable box).
- Wait for approximately 15 seconds, allowing any remaining power to drain from both devices.
- Power on both the TV and the external device.
When you follow the steps listed above, the HDMI signal will be re-established and validated, ensuring the correct resolution is communicated between the TV and the connected device.
3. Update the TV Software
If your Samsung TV is outdated, it can often result in various glitches and errors. To mitigate these issues, it is recommended to regularly update your TV’s software to ensure that any bugs are addressed. You have the option to set up automatic updates or perform a manual update.
To enable automatic updates, you can follow these steps:
Step 1: Using your Samsung TV remote, go to the settings page.
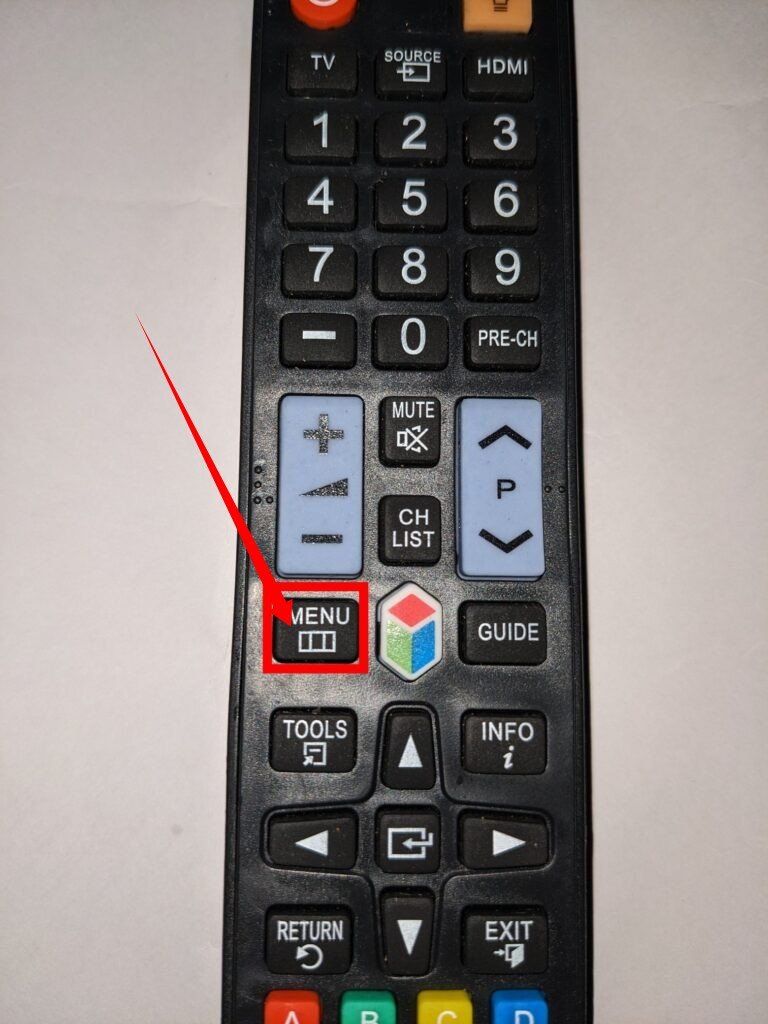
Click on Support
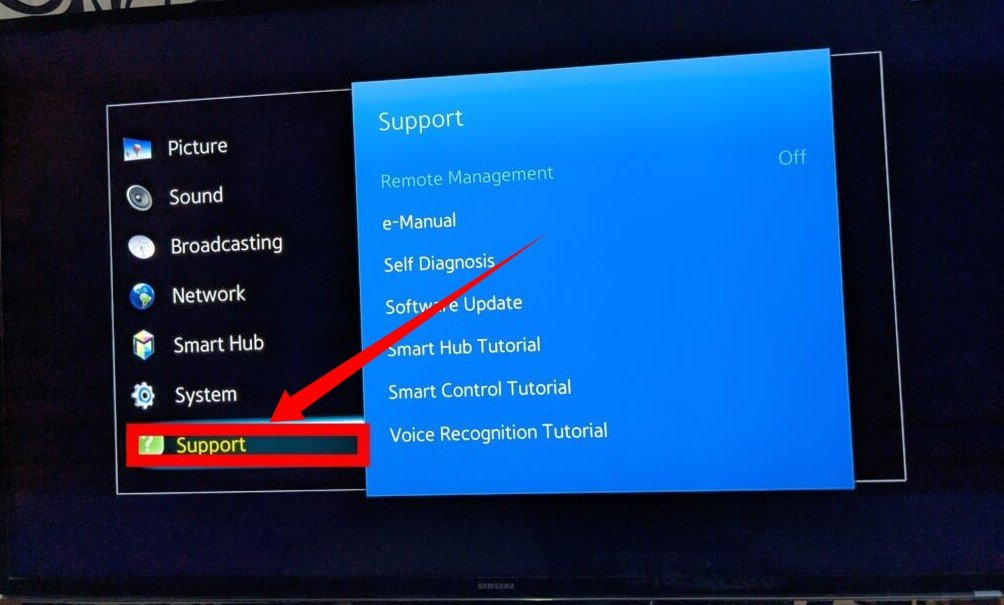
Next, select Software Update
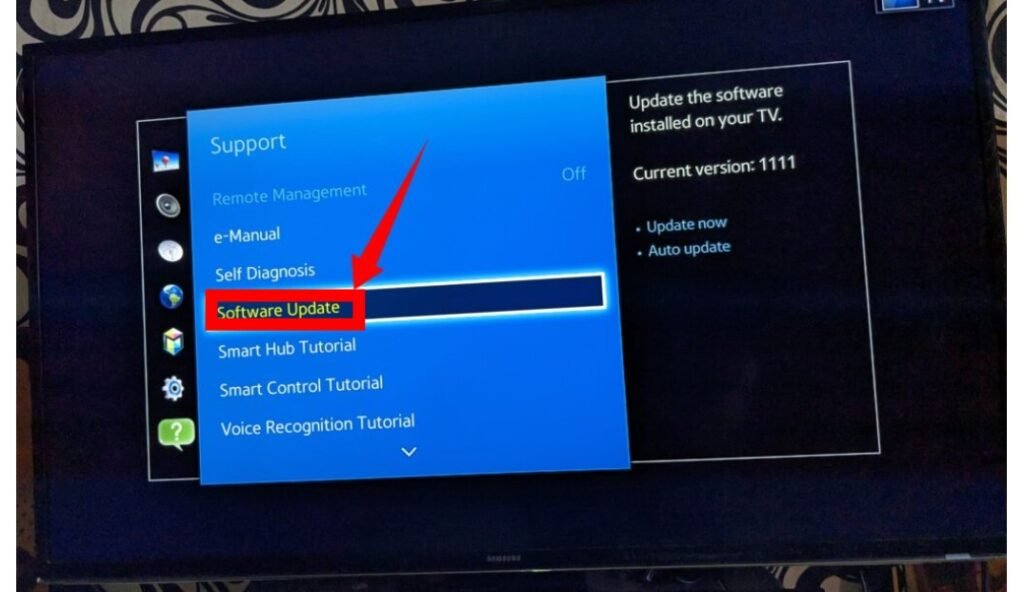
Now you have to select the Auto-update feature
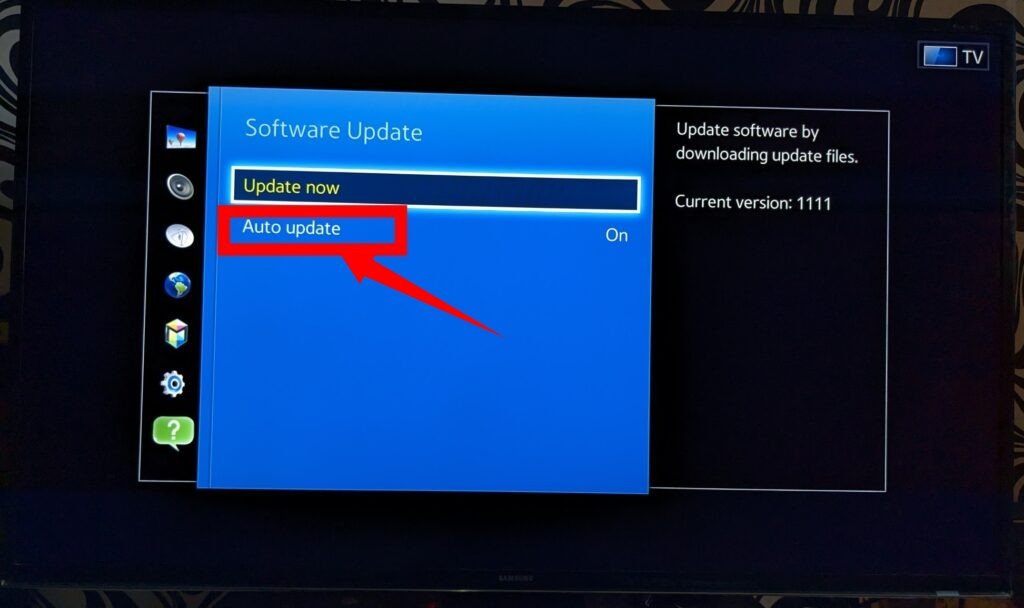
Then, choose ON and select OK to save the changes you’ve made.
You can also go the route of a manual software update on your TV by doing the following:
Pick up your TV remote button and click on the Menu button.
- Go the settings page.
- Click on Software Update.
- Choose the Update Now option
4. Use a Not-too-Long HDMI CABLE
In many instances, the problem can be attributed to the HDMI cable being used. When the cable length exceeds a certain limit, it may result in data transmission glitches. It is recommended to use an HDMI cable that is between 6 and 8 feet long for optimal performance.
Moreover, if you require a cable longer than 12 feet, it is important to ensure that it is an ISF-rated cable. ISF-rated cables are designed to maintain high signal quality over longer distances, reducing the chances of data loss or interference.
5. Configure the Output Resolution of the External Device
You can configure the resolution settings on your external device to automatically detect the optimal display resolution for the content being shown. Additionally, you can select the highest resolution that is supported by both your TV and the external device.
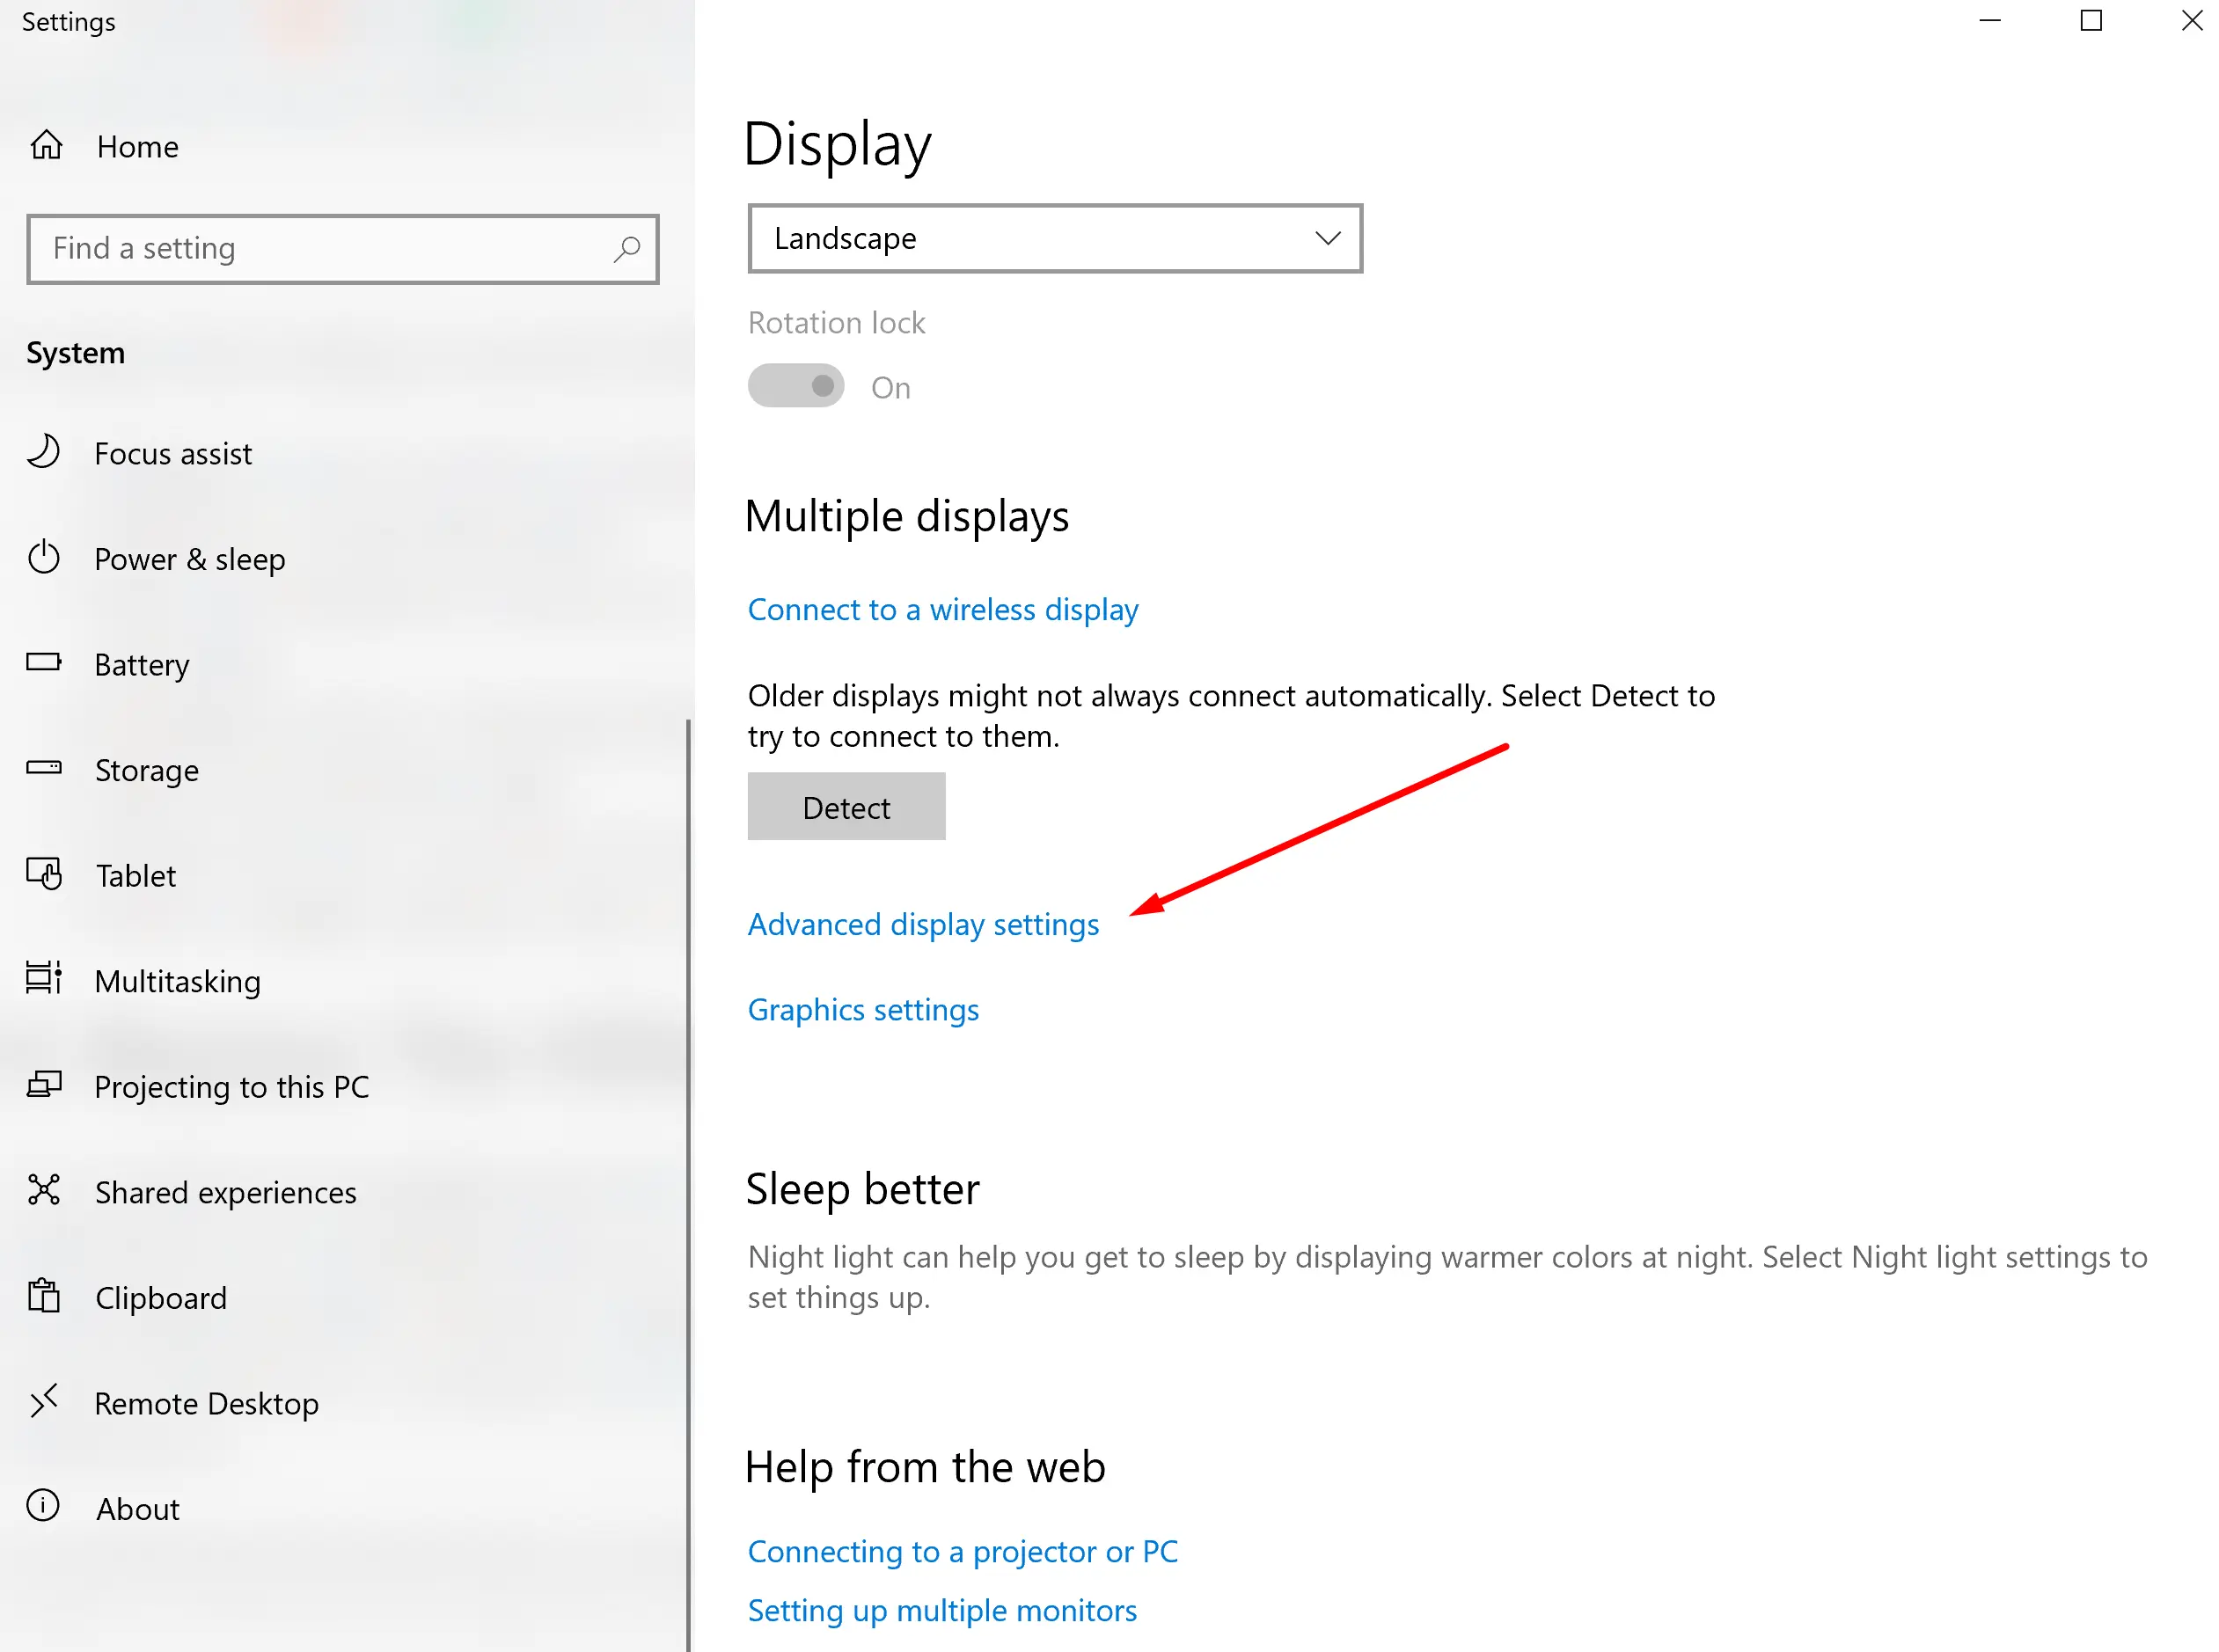
To adjust these settings on your PC, follow these steps:
- Navigate to the search bar on your computer.
- Search for “Screen Resolution.” Should be under Display settings
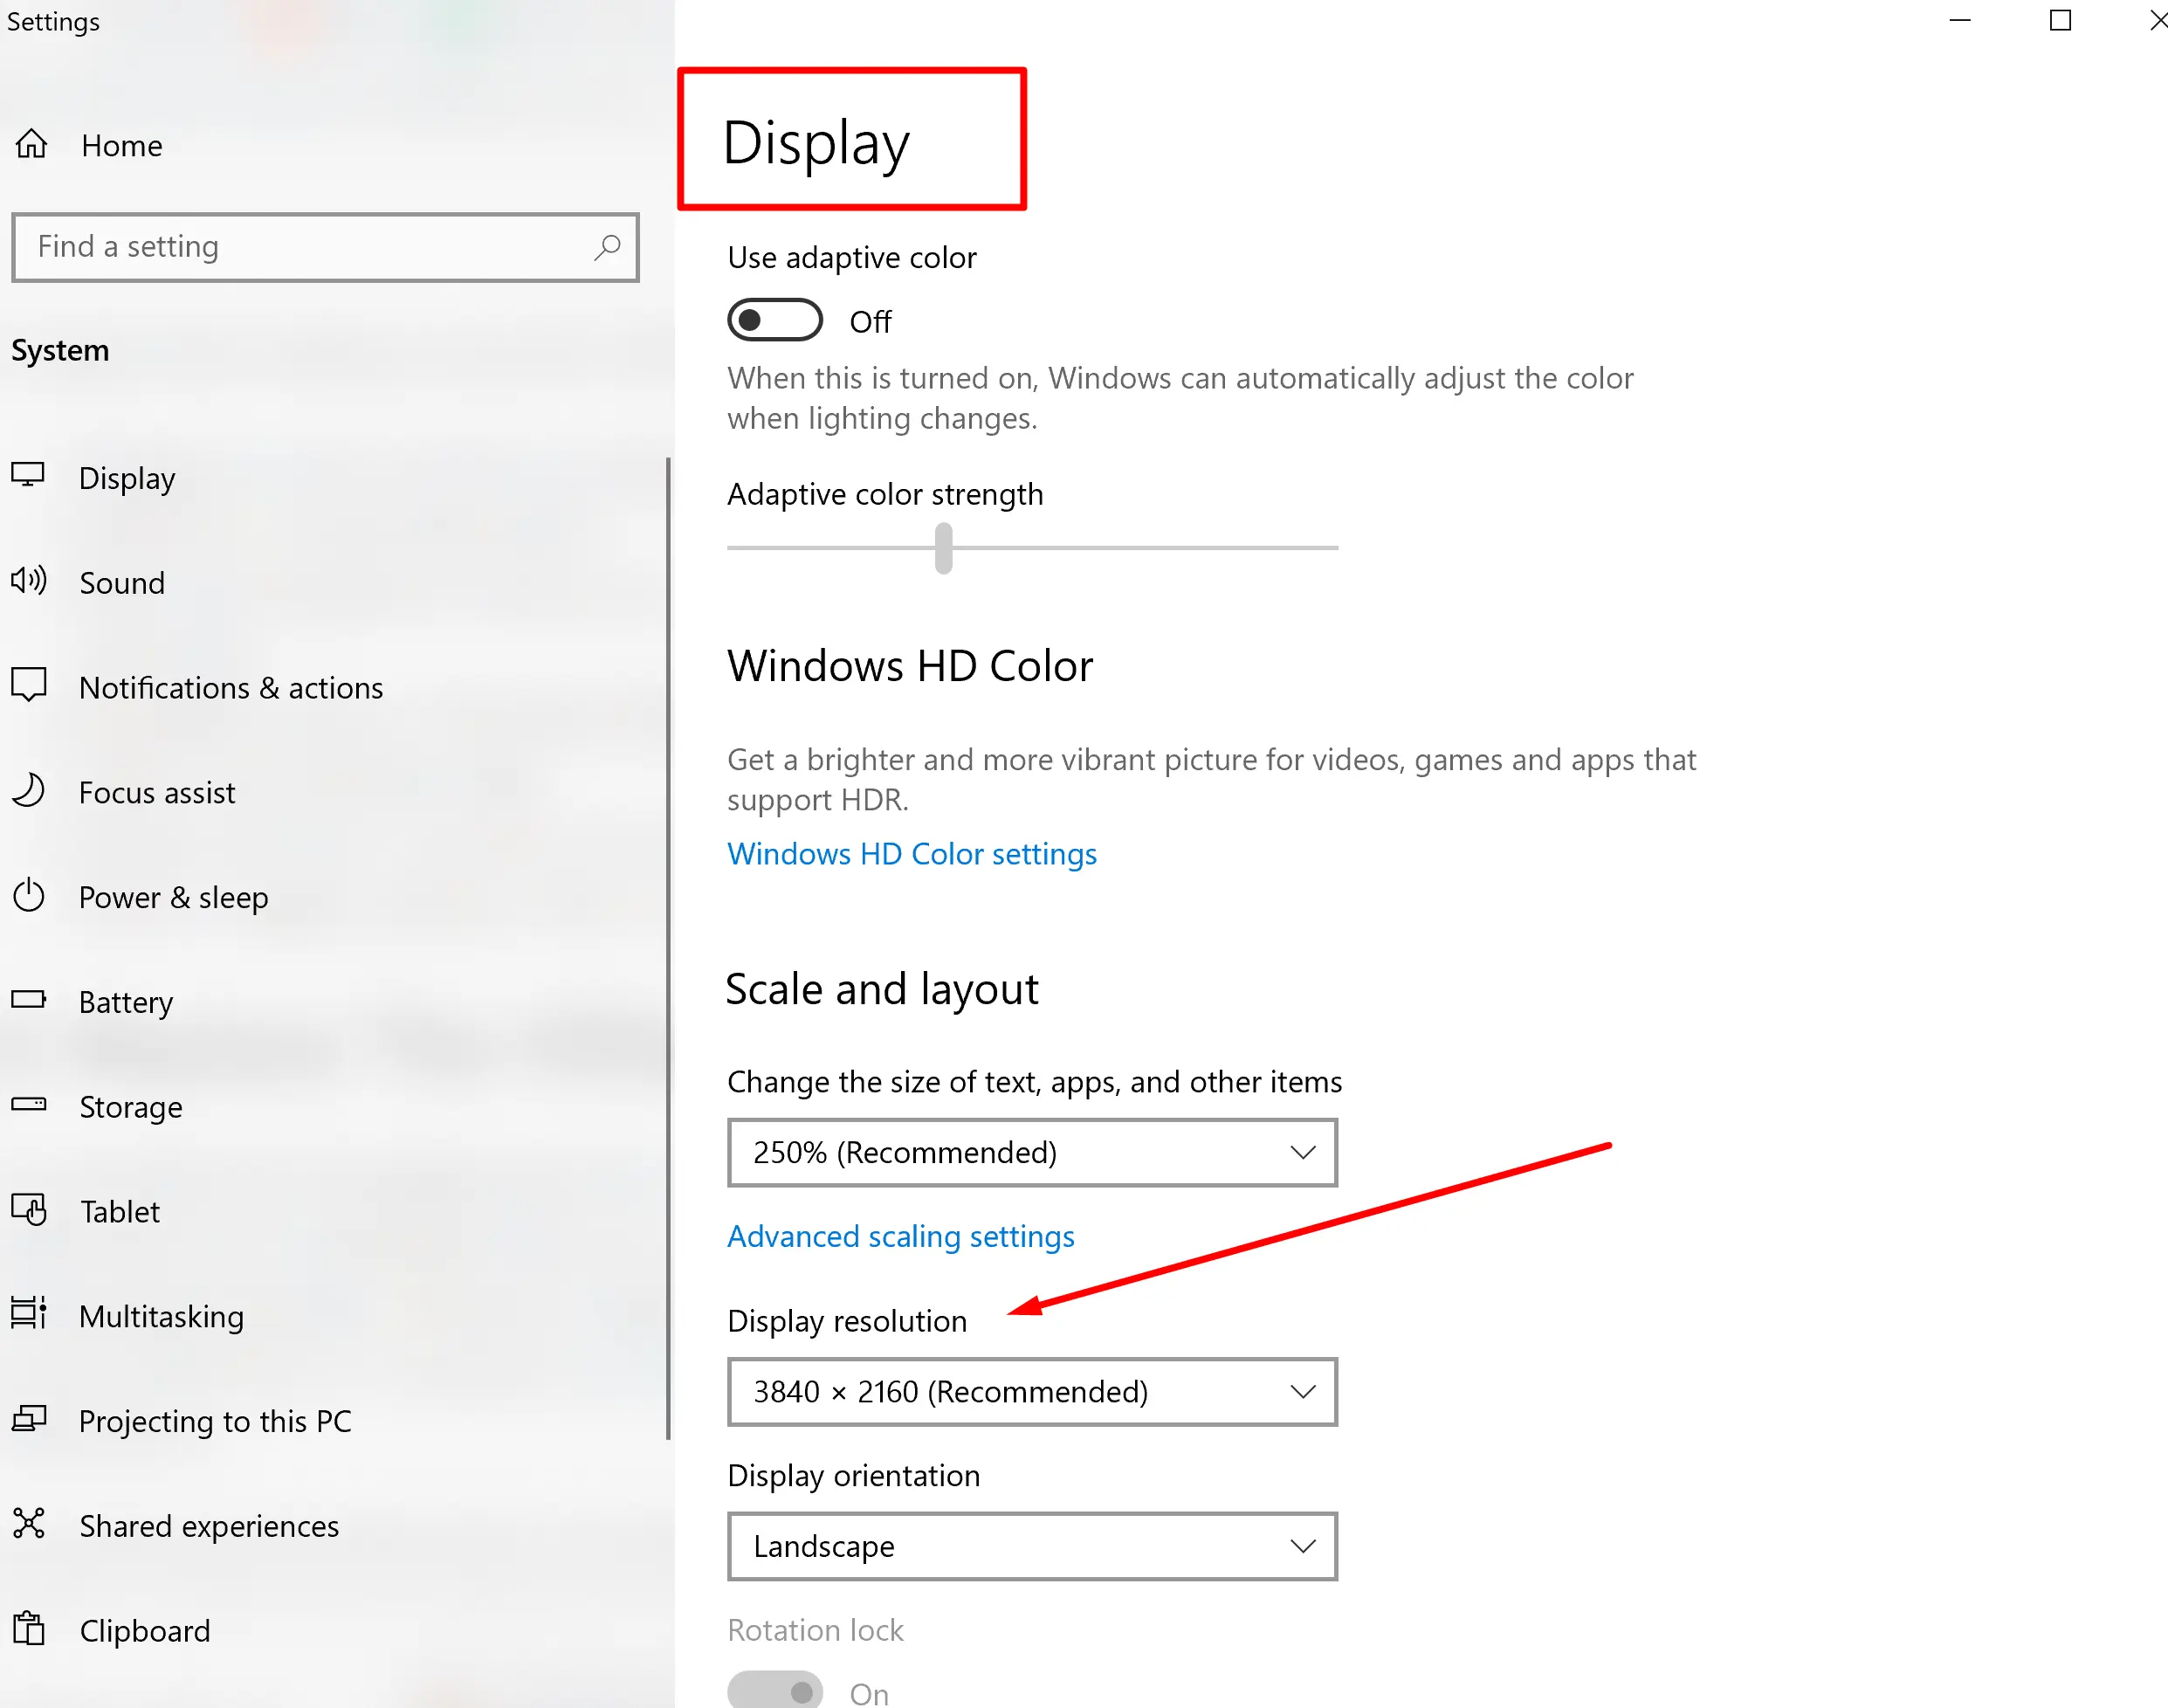
- Select the “Resolution” menu and scroll down to “1024×768” or the desired resolution.
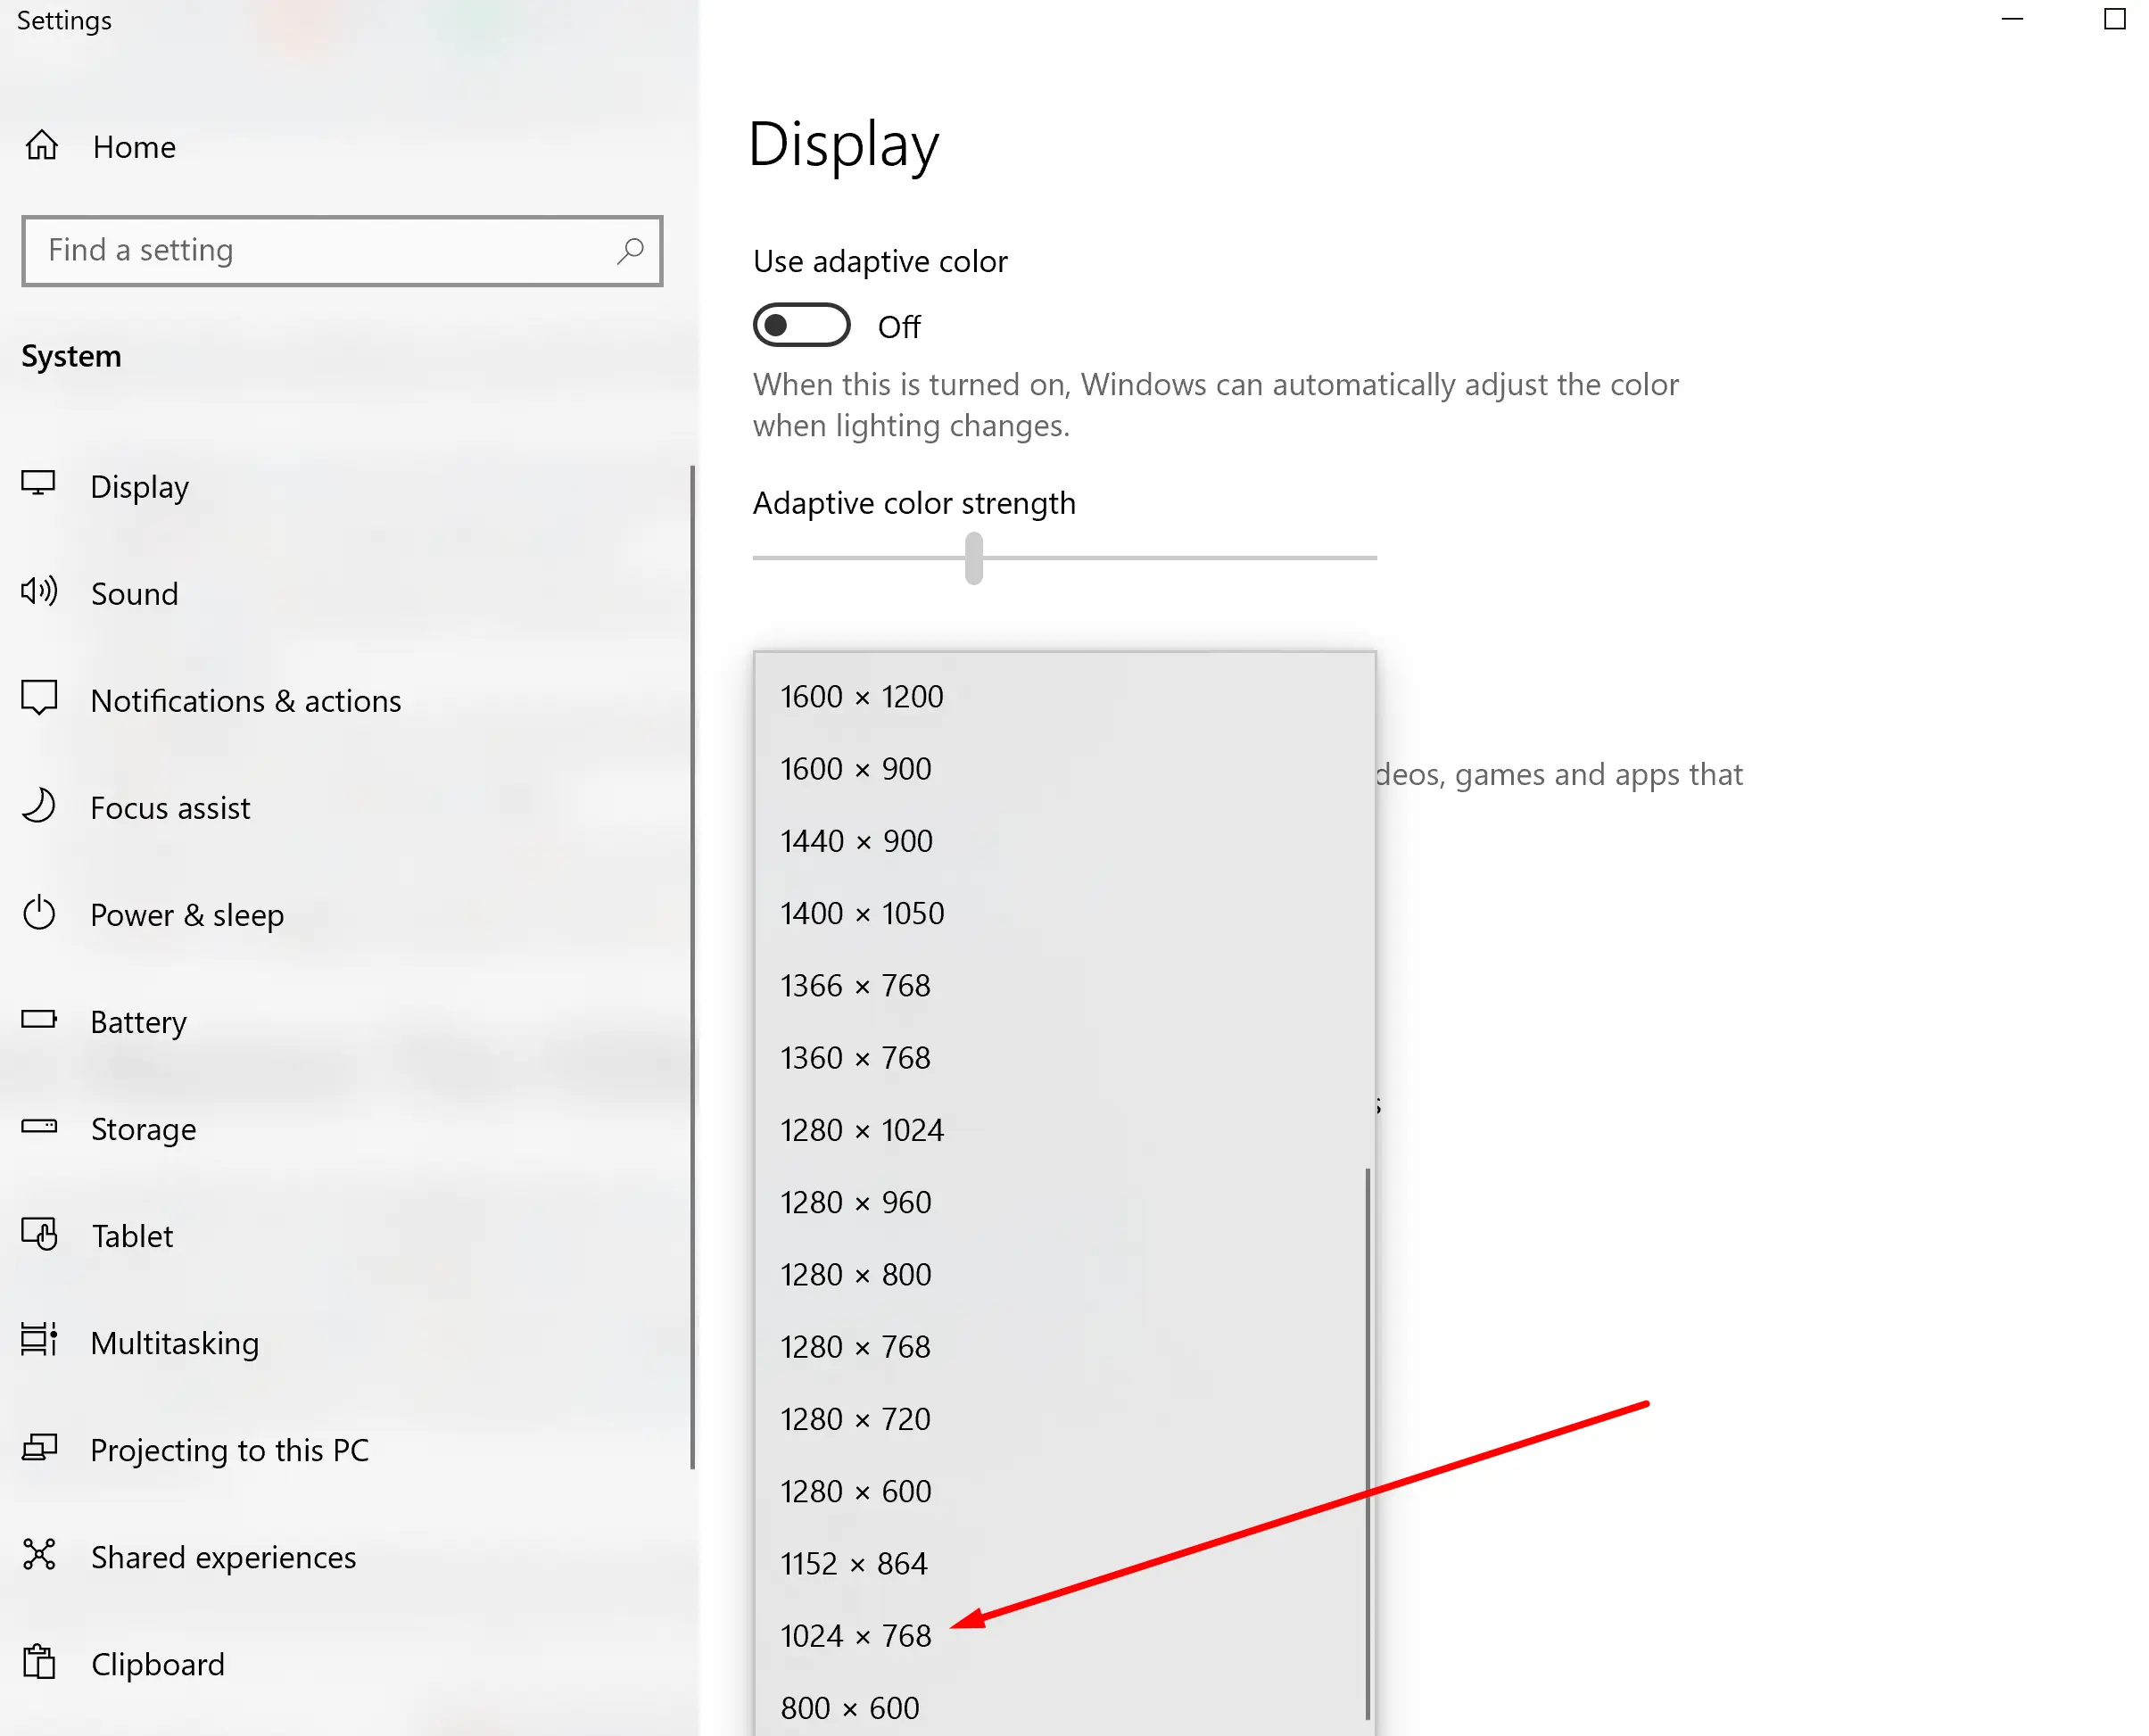
- Proceed to click on “Advanced Settings.”
- Click on the “Monitor” tab.
- Choose “60 Hertz” under the “Screen Refresh Rate.”
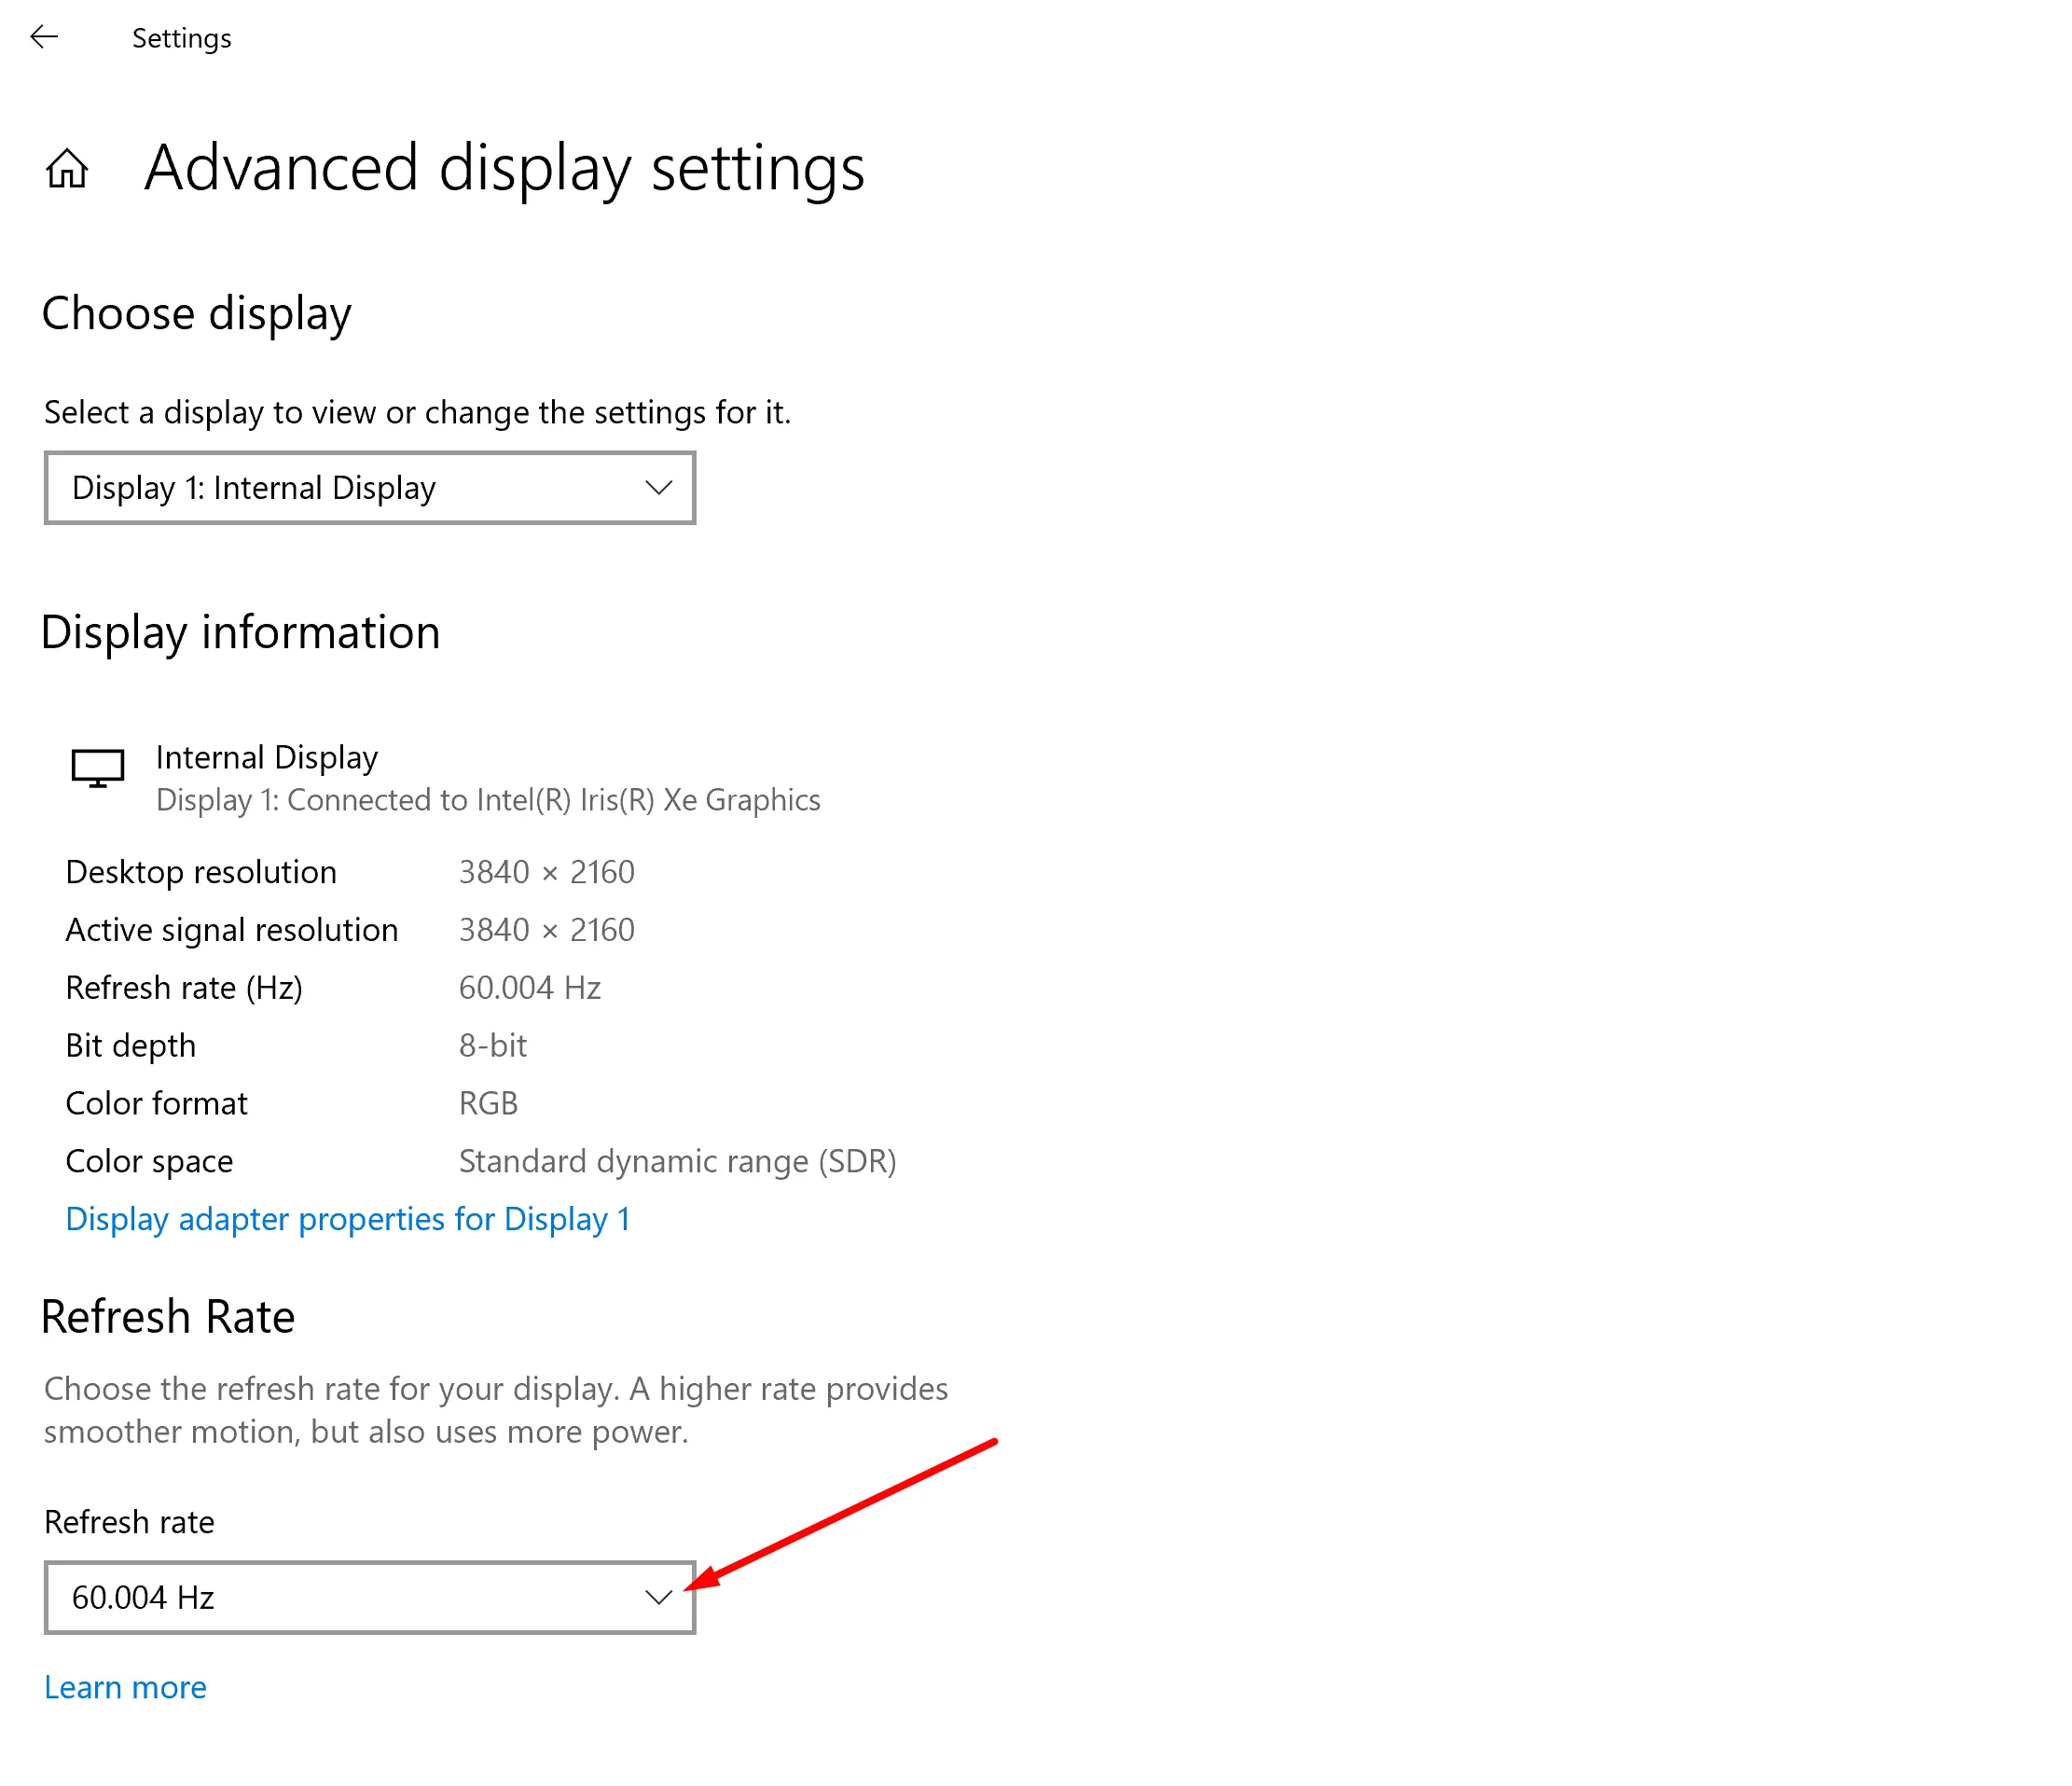
- Click on “Apply” or “OK” to save the changes to your settings.
6. Replace The HDMI Device
It is possible that the problem lies with the signal being transmitted from the HDMI device. To troubleshoot this, you can try using a different HDMI device set to the exact resolution. If the error message does not appear when using the second HDMI device, it indicates that the issue lies specifically with the original HDMI device.
As previously mentioned, there are several possible reasons why your TV may display a “mode not supported” error. However, by following the straightforward troubleshooting suggestions provided earlier, you should be able to resolve the issue. Alternatively, if you require further assistance, you can reach out to Samsung Support for potential solutions to this error.
